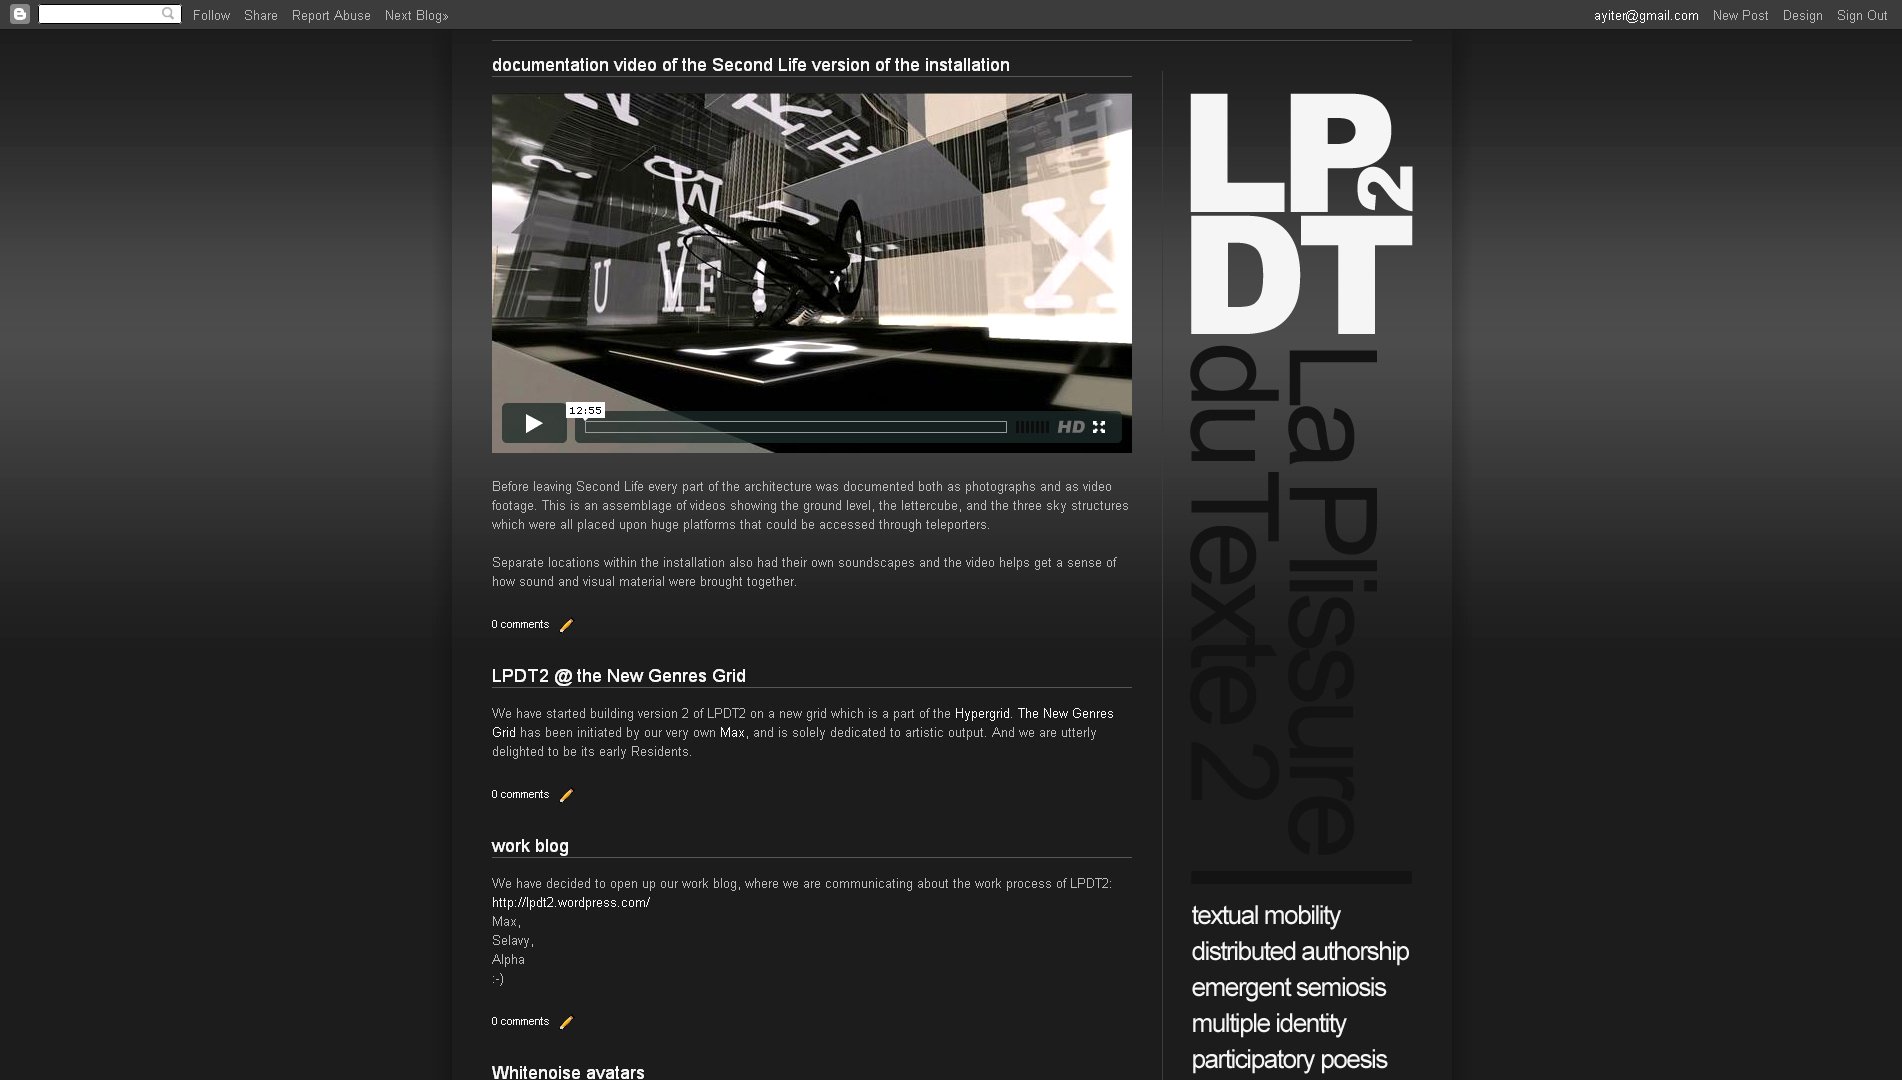
embedding a wix site into blogspot (or any other type of site)
Wix is great - of course! Embedding a wix file someplace else is even better! The photo gallery above was made with wix, using their photos. I just made a simple little page which is the post width of this site. However, you could get far more fancy and do some really great headers or side bar elements using wix and the custom HTML/Javascript widget here on blogspot.
Unless you have a premium wix site, you will of course have the wix preloader and their little logo on the side, however personally I find these completely appropriate and inoffensive for something which is after all free!
The embed code is given to you as you are publishing the site, shown in the image below:

And below is how the code will look. If you do not want all the social networking stuff which is located at the bottom of a regular wix site, simply remove the black highlighted bits:
<object width="513" height="310" type="application/x-shockwave-flash" classid="clsid:D27CDB6E-AE6D-11cf-96B8-444553540000" codebase="http://download.macromedia.com/pub/shockwave/cabs/flash/swflash.cab#version=10.0.0"><param name="allowFullScreen" value="true"/><param name="allowNetworking" value="all"/> <param name="allowScriptAccess" value="always"/><param name="base" value="http://static.wix.com"/><param name="movie" value="http://static.wix.com/client/app.swf" /><param name="quality" value="high" /><param name="FlashVars" value="pageId=xBcJA71T1Y8-a&embedFormat=websites&embedID=0b5fc474-1689-4d89-9a28-f51fb88064e7&partner_id=WMGs4POB1ko-a" /><param name="scale" value="noScale" /><param name="salign" value="tl" /><embed src="http://static.wix.com/client/app.swf" quality="high" allowNetworking="all" allowScriptAccess="always" allowFullScreen="true" FlashVars="pageId=xBcJA71T1Y8-a&embedFormat=websites&embedID=0b5fc474-1689-4d89-9a28-f51fb88064e7&partner_id=WMGs4POB1ko-a" style="border: Xpx solid #yourhexcode;" type="application/x-shockwave-flash" width="513" height="310" base="http://static.wix.com" scale="noscale" salign="tl" ></embed></object><br/><a href="http://www.wix.com"><b>Free website</b></a> - <a href="http://www.wix.com/create/website" ><b>Powered By Wix.com</b></a>
(Note: The border code from the previous post will work just as well with an object embedded from wix. In this case you place it before type="application/etc inside the embed tag like I am showing you above with the bit which is highlighted in red. For the wix file, which I embedded above, I used a 1 pixel border in a medium gray (#888888).
One thing to bear in mind is that if you want a border do not forget to size your output in wix accordingly before you import it to your blog/site. As an example, the post width on this site is 515 pixels, however I published the wix file at 513 pixels in order to accommodate the 1 pixel border around it).
http://www.wix.com/
.................................................................................................................................
how to add a border around objects embedded into blog posts (such as a google map or a youtube / vimeo video)
If the images on your blog have borders you may wish to have them around other visual material as well, so as to achieve design consistency. Google maps are one such bothersome element, I think. In order to place a border around a google map, look for the embedded code in your post and add what is highlighted in black:
<iframe style="border:Xpx solid #yourhexcode" frameborder="0" width="X" height="X" marginheight="0" marginwidth="0" scrolling="no" src="yourmapurl" width="X"></iframe>
And just tried the same snippet, placed in exactly the same location on a youtube video. Yayy! Same exact result!
<iframe style="border:8px solid #111111" width="500" height="410" src="hhttp://www.youtube.com/embed/rHZUPJji6w8" frameborder="0" allowfullscreen></iframe>
And vimeo too! With this one, although the aspect ratio is the same (3 x 4) as the youtube video, I had to tweak the overall box size a bit since the player configuration seems to be slightly different. But no biggie, done in a second!
(Note: One thing to bear in mind is that if you want a border do not forget to size the embedded output accordingly. As an example, the post width on this site is 515 pixels, however I set the video files at 500 pixels in order to accommodate the 8 pixel border around them).
blogspot stuff: adding a background color to the date header of the awesome.inc template
Find this code in the HTML editor (widgets expanded, of course):
.main-inner .widget h2.date-header span {font: $(date.font);
display: block;
padding: .5em 15px;
border-left: $(date.border.size) solid $(date.border.color);
border-right: $(date.border.size) solid $(date.border.color);
}
Then replace that one with this one:
.main-inner .widget h2.date-header span {
font: $(date.font);
padding: 1px;
margin-left: 14px;
border-left: $(date.border.size) solid $(date.border.color);
border-right: $(date.border.size) solid $(date.border.color);
background: #yourhexcode
}
As you can see I have removed one line and also changed the padding. I also added a left margin in order to align stuff, your values may again be quite different than these. These are things that looked good with my particular design, you may want to go with other values or even keep the block display altogether, in which case the colored area will stretch across the width of the post as a bar.
.................................................................................................................................
behance professional portfolio site

Just received this as a behance notification and it does seem worth sharing:
Admittedly, the price for this (11USD per month) is rather on the steep side, considering that you could get a fully hosted site for about half the price at places like Bluehost, or indeed that with a bit of ingenuity you could very easily set up a similar site right here on blogspot for free.
However, on the upside, you do get the considerable professional design expertise of the behance team in the shape of some beautiful and fully customizable templates, which could save a lot of time. And, probably most importantly, given that behance is one of the highest regarded design portals online my guess would be that having a site hosted by them would be likely to get you exposure you might not get all too easily through a standalone site.
However, on the upside, you do get the considerable professional design expertise of the behance team in the shape of some beautiful and fully customizable templates, which could save a lot of time. And, probably most importantly, given that behance is one of the highest regarded design portals online my guess would be that having a site hosted by them would be likely to get you exposure you might not get all too easily through a standalone site.
.................................................................................................................................
semi-transparent and/or image background for all posts in blogspot
This is a step by step tutorial for creating a transparent/image background for the entire main posts section.
1- Creating a transparent .png:
Create a new photoshop (or whichever program you are using) file with 16x16 or 32x32 size, 72 resolution and tranparent background. Fill it with the color you wish to use, then change the opacity of the layer to a desired amount (a value between 70 to 90 is optimal). Save it for Web & Devices, making sure you have png24 and transparency selected. Now, upload it to somewhere (picasa etc.), so that you can have an url of the image which we will need later.
2- Template Designer:
Navigate to your blogger account's template designer tab. Select Advanced, here depending on your blogger template you will either have "Post Background" or "Background", first look for Post Background if you don't have it, select the other one.
For people with Post Background
From the color picker of Background Color, put a tick to transparent. If you don't want borders, do the same for Border Color.
For people with Background
From the color picker of Main Background, put a tick to transparent.
Finally apply to blog.
3- Edit HTML
Under the Edit HTML tab, look for this piece of code,
For people with Post Background in the previous step,
find,
.date-outer {
in it there is a line like this,
background-color: $(post.background.color);
replace it with this line changing the "image_url" with the actual url of your image
background: url(image_url) repeat;
For people with Background in the previous step,
find,
$(content.background.color.selector) {
in it there is a line like this,
background-color: $(content.background.color);
replace it with the following changing the "image_url" with the actual url of your image
background: url(image_url) repeat;
.................................................................................................................................
.................................................................................................................................
how to get google to be totally in love with you... ;-)
What we were talking about just before the class broke up today, made into a little blog post for you:
1) Good, focused, (and if at all possible) original content. This is the one and only and penultimate thing that counts! Without good content, forget it, it just won't happen. What you have on your site simply has to be of interest to others - either specialist groups or general entertainment, but it has to be really good stuff! And my general hunch with this is that specialty sites are far more likely targets to get hits, since there is bound to be more search engine activity related to a specific topic, than there will be to general chit chat.
2) A large site will have more material for the search engine to find. Very simple logic really. If you have 100 posts it is far more likely that you wrote about something that somebody out there is searching for than if you have only 10. The larger the easypeasy site gets the more search engine results we get, no doubt about it. When we had only 10 posts, we had none. Nowadays with over 100 posts under our belts we have at least 5 or 6 a day and very often many more, sometimes as many as 20 even...
3) Make sure your site is structured well in terms of navigation. Even the best content in the world is useless if folk have to work too hard to get to it, they will simply not bother and leave and never come back. And needless to say, forget about them recommending it to anyone else... Read Selim's excellent post on navigation to get more insight on the matter here >>>
3) Make sure your site is structured well in terms of navigation. Even the best content in the world is useless if folk have to work too hard to get to it, they will simply not bother and leave and never come back. And needless to say, forget about them recommending it to anyone else... Read Selim's excellent post on navigation to get more insight on the matter here >>>
4) Post often and consistently. In other words, not silence for a whole month and then 10 posts all at once, but more like 3 posts a week, and every week. Remember that you can also write a whole batch and then pre-date them. I am not exactly sure how or why this makes a difference but a site which is consistently active seems to draw more traffic, a thing which I can tell very easily from the site stats of my own blogs.
6) Make sure your post title comes before your blog title. More on this here >>>
7) Make sure you have a lot of links to other sites, either inside the posts or as sidebar elements: Your courtesy to others is likely to generate courtesy in return by them linking back to you - after all, this is how the internet works...
7) Make sure you have a lot of links to other sites, either inside the posts or as sidebar elements: Your courtesy to others is likely to generate courtesy in return by them linking back to you - after all, this is how the internet works...
8) Use social networks efficiently. Tweet your blog and also post it on facebook, linkedin etc. Also if your site's content is at all relevant, start creative network accounts such as on youtube, Flickr, deviantart, vimeo etc. Use the groups within these domains to put out videos and photos and link these back to your site.
9) Finally, be patient! It will take some time for people to find you - anything up to 6 months to even a year, depending on how fast your site is growing and on how good your content is. Usually you will hit the really big visitor numbers only after one of the major portals or blogs, one that covers the same area of interest on which you are focused, spots you and blogs you. This will take time. Just keep on posting and once you have enough good stuff it will happen - count on it.
.................................................................................................................................
embedding a flipbook into a blog with issuu
Last time I looked into this (which was a few months ago) it still wasn't possible to do so but I just found out that you can now embed flipbooks which you create with issuu into other domains! Gave it a try just now and as you can see above it works beautifully!
So, all you need to do is create a free account with issuu, make your flipbook by following the instructions on the site which involve combining the images of your left/right pages into a pdf which you then upload into your issuu library. Once the book has been crunched by the system it will be published, at which point you will find the embed icon (looks like this < >) under the thumbnail of the book. Make sure you have all the correct things checked on the menu which appears when you click on the tags (such as having the double page view as default!), then copy and paste everything into the HTML tab of the post editor and you are done! You can also change the height and width of whatever appears on your blog by playing with the values inside the embed code. If you do so remember to use a calculator so that the aspect ratio remains correct.
Tip: When you publish this there will be several text links which appear under the small flipbook on your site. If (like me) you do not want these text links simply delete the bottom part of the code, which will look something like this:
<div style="text-align: left; width: 420px;"><a href="http://issuu.com/elifayiter/docs/ctrl_xyv?mode=embed&viewMode=presentation&layout=http%3A%2F%2Fskin.issuu.com%2Fv%2Flight%2Flayout.xml&showFlipBtn=true" target="_blank">Open publication</a> - Free <a href="http://issuu.com/" target="_blank">publishing</a> - <a href="http://issuu.com/search?q=computer" target="_blank">More computer</a></div>
.................................................................................................................................
navigate in style or fail miserably
Good navigation is the most important aspect of a well designed website. If the visitor is not presented with a clear navigation, it won't matter how well your site is designed, it is highly likely that they will leave your page in a matter of seconds. It is a very tough challenge to create a meaningful and unambiguous yet stylish navigation that allows users to view content easily.
Some of the most important rules of a good navigation are;
1- Visibility: Make sure that your navigation is one of the first things that catches the eye. Do not make it obscure. Don't let it get hidden because of clutter or problematic placement.
2- Consistency: Make certain it has a certain style and placement that it keeps on every page.
3- Clarity: Make sure that every item in the menu is %100 understandable. No one likes to guess where the link will take them. Use either clear names, or little explanations, hover titles are a good way as well. If you are using thumbnail images as links in your menu, make sure they are clarified one way or another.
4- Creativity: Creative navigation will always make your site stand out more, just make sure you don't overdo it, sometimes simplicity is the real creativity.


Clear well designed navigation. Nice use of typography.

This is especially for those designing blogs, very slick and clear navigation ina 3 column design. Nice use of sidebars and top level menu design.

A very good example of how to fit massive amounts of content into a navigation in a stylish way.

Clear, playful, hand-drawn and animated navigation.

Simplicity, minimalist design, left aligned side navigation.

Nice clear navigation.

Playful navigation consistent with the style and content of the page, usability is top-notch.

Very simple and very attractive, everything is easy to follow and you always get to where you want to go.

Creative way of categorization. Easy to follow, the only problem is it is a bit space consuming.

Interesting and creative menu design. Takes a little bit of getting used to but the filter and sorting menu is a must see.

Impressive use of top tier navigation, clear simple and yet stylish.

Good example of Apple inspired navigation, everything is consistent and clear.

Little explanations when you hover over the menu items is a great way of guiding your visitors through your site.

Another clear navigation

Very slick navigation. 2 tier top level navigation, the sub tier works especially nice in works section. It is a bit graphic heavy when you use the works next, previous project navigation, but it looks really cool.

Unconventional right-side tabbed navigation does actually work very well in this site. Scroll down to see how the navigation changes style beautifully.
Also see these...


And when it fails....

First of you are presented with bouncing links that kind of sattle later on. And guess what not everything that looks like a link is clickable, not a very satisyfying navigation for a visitor.

Seriously.. where is the navigation. Am I supposed click on those bottles, is that it?

Don't get fooled by the top lunch and dinner items, they are unclickable. There is a small thing under the disturbing video called navigation, well it seems to work if you refresh the page 10 times.

When simplicity fails miserably. Worst use of top tier navigation. It looks like a word document rather than a webpage. And that isn't the worst part, just go on, decrease the size of your browser window and see what happens.

Wow simply amazing, the middle menu runs away when you move your mouse to click. Plus the content font is so small that it is impossible to read. Check out the news section and you will see.

Menu items continuously change into images that don't give any clues to what they are connected. Very irritating navigation.
.................................................................................................................................
free flash photo galleries + free swf hosting
Just stumbled upon this:
A lot of these are freebies and some of them could look really cool on a custom designed header, or embedded into a page post as a photo gallery.
In order to be able to do this you will need to host your swf file somewhere - unless you have your own server or a remotely hosted site, that is. Here are a couple of places that seem to do the job, for free:
In order to be able to do this you will need to host your swf file somewhere - unless you have your own server or a remotely hosted site, that is. Here are a couple of places that seem to do the job, for free:
.................................................................................................................................
blogspot: unlocking the header widget so that you can place it in a different location
Oooops! A couple of posts ago I was talking about making a vertical header and completely forgot to mention something very important related to that: In order to move your header to a different location on the site you will have to do some sniffing around inside the HTML editor (with expanded widgets!), where you need to find this line:
<b:widget id='Header1' locked='true'and change it to
<b:widget id='Header1' locked='false'
.................................................................................................................................
design + details: padding the widgets

Fairly self-explanatory image I would say... On the left is the default state and on the right is the one where I have tweaked padding values by placing this code in the CSS box on the Advanced Editor:
#Label1 {
padding: 24px;
padding-bottom: 8px;
}
The padding makes a huge difference as to how this looks. The strokes become much sleeker when they stop a bit short of the border, and the top and the bottom of the box is also sitting much better now that I no longer have that big space below the last line.
.................................................................................................................................
design: making a vertical header
I have been meaning to try this out for quite some time, for a number of reasons: First off, it does get kind of boring to always have horizontal headers at the top of a website: The way in which a website is constructed vertical elements such as the columns do look very good. So, why not use the vertical components of the layout for design strategies, as well as a place for info elements such as labels and link lists?
And then also, web real estate: If you have the content starting all the way at the top of the page, you will be showing considerably more at first sight - obviously.
And then also, web real estate: If you have the content starting all the way at the top of the page, you will be showing considerably more at first sight - obviously.
I just made a website for an art project in which I am involved, and since the logotype of this is a square which works well when placed on a corner with the site description "dropping down" from it (so to speak), this seemed a very good opportunity to give the idea a shot.
Remember that before all else you will need to unlock the header widget! To find out how this is done read this post here >>>.
The template which I used is the one which I took from this site, except that I changed the layout and the number of columns, as well as their widths and proportions, so that the vertical header fit into the corner without looking cramped in. Needless to say the whole thing took a bit of aligning, which these days I do quite quickly by playing with the margin values, as is explained here >>>
See the result here:
.................................................................................................................................
blogspot page bottom: customizing the pager, the footer, the subscriptions links, etc...
Again we have Furkan to thank for this really great information which deals with all of the elements on the bottom of a blogspot site:
To delete the "subscribe to posts (atom)" line find the line <b:include data='feedLinks' name='feedLinksBody'/> inside the HTML code, and simply delete it.
To remove the attribution gadget (that is the "powered by blogger" line), find /* Footer, and to the end of this section add the line display:none;
(Note: I am not sure if removing the attribution gadget is something that Blogspot takes very kindly to. There may even be legal issues involved with doing so. So be careful with this one, I would say!)
And now the really cool part: Customizing the pager, which is the section where you have the links which lead you home, to older posts and to newer posts! You can change the default link text with anything that you wish and you can even replace it with images.

Above you can see how I customized the bottom area of the shoezznutzz site with little arrows pointing left, right and upwards on the pager and by removing the subscription link. On his own site Furkan used the shark on his header which he converted into an arrow. Brilliant!
The code for doing all this is somewhat lengthy, so I am going to direct you to Furkan's post about this here >>>, or...
The code for doing all this is somewhat lengthy, so I am going to direct you to Furkan's post about this here >>>, or...
Find this part in your code:
<b:includable id='nextprev'>
<div class='blog-pager' id='blog-pager'>
<b:if cond='data:newerPageUrl'>
<span id='blog-pager-newer-link'>
<a class='blog-pager-newer-link' expr:href='data:newerPageUrl' expr:id='data:widget.instanceId + "_blog-pager-newer-link"' expr:title='data:newerPageTitle'><data:newerPageTitle/></a>
</span>
</b:if>
<b:if cond='data:olderPageUrl'>
<span id='blog-pager-older-link'>
<a class='blog-pager-older-link' expr:href='data:olderPageUrl' expr:id='data:widget.instanceId + "_blog-pager-older-link"' expr:title='data:olderPageTitle'><data:olderPageTitle/></a>
</span>
</b:if>
<b:if cond='data:blog.homepageUrl != data:blog.url'>
<a class='home-link' expr:href='data:blog.homepageUrl'><data:homeMsg/></a>
<b:else/>
<b:if cond='data:newerPageUrl'>
<a class='home-link' expr:href='data:blog.homepageUrl'><data:homeMsg/></a>
</b:if>
</b:if>
</div>
Now, if you want to change the text, just delete these underlined parts and write you own text.
If you want to put an image source, delete them, put this: <img src="Image URL" />
.................................................................................................................................
blogspot stuff: removing the top navigation bar
Very simple, if you know where to look, which our ingenious student Furkan obviously did: Go to the HTML editor and find this bit of code: ]]> Before this snippet put #navbar { display: none; }


Furkan tried it and as you can see it works perfectly!
I tried it too and the only fly in the ointment which I can see with this is that it makes one lose the quick access to the design button on the right hand side of the bar. I guess one could keep the design editor open in a separate tab or something.
I tried it too and the only fly in the ointment which I can see with this is that it makes one lose the quick access to the design button on the right hand side of the bar. I guess one could keep the design editor open in a separate tab or something.
Thank you again Furkan and keep the good stuff coming please. Much appreciated!
................................................................................................................................
is becoming a designer a matter of "talent"?
No, it is not, I would say.
What has brought on this post is that one of my students (a non-design major) has just let me know that she is dropping out of the class. It is the 9th week of the semester and it is her last chance to do so. Her reason is that she doesn't think that she has the talent for the job. I have tried to reason with her, however to no avail. She firmly believes that being able to put together a good website needs a special sort of talent, which she doesn't think that she has. Taking the class has made her realize that, she says.
Of course it does take what one might call a special talent if we are talking about the high end of design work: High powered art directors, visionary designers and typographers - these people do have a special something going for them, obviously. That said, anyone who has common sense, a sense of order and hierarchy, who takes the time to look at the design output of others and examines what they see critically, can develop a sense of good design. Or put differently, anyone who can put visual elements together into one continuous whole (which is something that most of us manage to pull off every morning when we get dressed) can become a competent designer.
Maybe not so before the days of the computer and the abundance of resources that it has brought to our doorstep. Back in the bad old days (which I am actually old enough to remember very well ;-), before all else you did need the ability to draw. Which, as far as I am concerned, is not exactly a talent either but a skill.
Maybe not so before the days of the computer and the abundance of resources that it has brought to our doorstep. Back in the bad old days (which I am actually old enough to remember very well ;-), before all else you did need the ability to draw. Which, as far as I am concerned, is not exactly a talent either but a skill.
Common sense - that is what this is mostly about folks. And resourcefulness! Not some undefinable something that goes under the name of talent! Having a sense of huge enjoyment whilst making the stuff. Getting excitement out of finding a resource that will help solve a visual problem. And then getting a real kick out of the satisfaction of the problem solved. Those would be the basic prerequisites, in my book. Once those are in place, "talent" will follow - and much sooner than you think! :-)
.................................................................................................................................
blogspot post customization code snippets
Some things that I could think of (and found the code for at various places) that all relate to modifying the appearance of your posts. All sorts of things from post and post title background colors, to post title icons, to initials. This is a long and somewhat messy looking post, so I am going to ask you to very kindly take a little jump break and... :-)
Whatever is marked up in black is what you will need to change. Remember that you can do most of the stuff that applies to the entire blog (and not just a single post) in the Custom CSS box of the advanced tab of the template designer. This will allow you to see your changes as you tweak the code:
Whatever is marked up in black is what you will need to change. Remember that you can do most of the stuff that applies to the entire blog (and not just a single post) in the Custom CSS box of the advanced tab of the template designer. This will allow you to see your changes as you tweak the code:
Changing the background color and padding of a single post:
Place this line inside the HTML tab of the post editor, in the beginning, add your text, close with the slashed div tag:
<div style="background:#your hex value; padding:Xpx;">Your text goes here....
</div>
Changing the background image of a single post
Place this line inside the HTML tab of the post editor, in the beginning, add your text, close with the slashed div tag:
<div style="background:url(URL of your picture) no-repeat;">Your text goes here....
</div>
(Note: If you have an image which you would like to repeat, just change the word "no-repeat" to "repeat", or you can also remove the whole thing from the code altogether).
Centering the post title on the whole blog:
The code for this will vary from template to template, however what you need to do is this: Find the line which says h3.post-title in the HTML editor. Then place text-align:center; underneath that line and just above the }
Adding a small icon before the post title on the whole blog:
Find the first line of code below in the HTML editor, then add the second line, with your image URL:
<b:if cond='data:post.url'><a expr:href='data:post.url'><img src="Your image URL" style="border-width:0px"/><data:post.title/></a>
<b:else/>
<data:post.title/>
</b:if>
(Note: You can also place the icon in different locations, above and below or to the right of your post title. Read more about this here:
Adding a picture to the background of post titles on the whole blog
Find the first line of the below code in the HTML editor, then play with all the values highlighted in black:
h3.post-title {background: url(URL of your picture); background-repeat:no-repeat;
height:Xpx;
margin:.Xem 0 0;
padding:Xpx Xpx Xpx;
font-size:X%;
font-weight:normal;
line-height:Xem;
color:$titlecolor;
}
Adding color to the background and borders of post titles on the whole blog
Find the first line, then play with the values highlighted in black:
h3.post-title {background:#your hex code;
border:Xpx inset #your hex code;
margin:Xem 0 0;
padding:Xpx Xpx Xpx;
font-size:X%;
font-weight:normal;
line-height:Xem;
color:$titlecolor;
}
And if you want your post title to be underlined (like I did on this blog) use this line in the code above:
border-bottom:Xpx solid #your hex code;
Getting big dropcaps initials/or a big first letter in a single post
Go to the HTML tab in the post editor and place this code around the letter that you wish to have drop, play with the stuff highlighted in black:
<span style="float:left;color:#000000;font-size:Xpx;line-height:Xpx;padding-top:Xpx;font-family: Times, serif, Georgia;">your letter</span>
This one below for the initial you wish to go upwards:
<span style="font-family:Georgia,;color:#000000;
font-size:Xpx;font-weight:X;line-height:X%;letter-spacing:Xpx;">your letter</span>
All that I can think of for now folks. Maybe more will follow at some point... ;-)
.................................................................................................................................
using the blogspot text widget (and the post editor) to make menus and thumbnail galleries
On the right hand column of this site you can see a section where I have put a menu with thumbnails for template downloads. It just occurred to me that I never got round to posting on this little trick which I figured out and which makes it very easy to make something like this by using the text widget and the regular post editor. Here's how it goes:
1) Start a regular post - except do not publish it but save it as a draft! (You can always go back and add to it later as well if you just keep the draft).
2) Put all your images and text in the post. (Your text will wrap automatically, however remember that your images will need to be sized to the width of the sidebar that you are planning to put the widget into).
3) I guess you could also add a background texture/color, or a border, or a bit of padding while you are still doing the post entry, as explained here >>>. I haven't tried this myself yet, but I am assuming that all of these attributes would show up on the text widget as well.
4) Select all the stuff on the HTML tab of the post editor and copy.
5) Start a new text widget, go to the HTML tab, then paste the code you got from the post editor into there.
6) Save! Done!
.................................................................................................................................
finally! a good looking flickr widget!

If, like me, you have a flickr feed you will be wanting to show it on your blog. There are quite a few flickr widgets around, except that most of them look horrible enough to make you want to run as far away from them as you can, getting you stuck with nasty looking backgrounds and borders and huge big type.
Just stumbled upon one on Flickr itself which actually lets you modify the layout in such a way that you can get rid of all the text, backgrounds, borders, buddy icons and whatever else and only show photos of your choosing. The whole stream, or a set, or a group... And at perfectly decent sizes at that! And if you want to you can get this as a flash thingy also - although that one seemd a tad too small thumbnailwise. And yes, they actually give you the code, so you could modify this even further should you wish to do so - but why bother really? Looks decent enough to me as it is.
Note: I made the screenshot above on the dummy easy peasy site, which currently has a very dark background. The thumbnails float on whatever your background may be, so do not be misled by that.
Check it out here:
.................................................................................................................................
moving the header image in blogspot
I could beat myself up! All that time I spent trying to align header images! And it never even occurred to me that there might be a really simple way of doing it (or rather of polishing things off). Well, there is, and this is it:
#header img {
margin-top: 0px;
margin-left: 0px;
}
Paste the above code into the CSS box on the Advanced Template Editor, play with the values highlighted in black - and watch things move!
Not that this will save you the initial design work that needs to be undertaken in the image editor, obviously. To get a really good clean look you will still need to align the blog columns and the header elements in the way in which I described it here. However, all that done, you may (and probably will!) need to tweak things still further once back inside the HTML environment. And that would be the point where this code snippet will prove its weight in gold!
Not that this will save you the initial design work that needs to be undertaken in the image editor, obviously. To get a really good clean look you will still need to align the blog columns and the header elements in the way in which I described it here. However, all that done, you may (and probably will!) need to tweak things still further once back inside the HTML environment. And that would be the point where this code snippet will prove its weight in gold!
.................................................................................................................................
finding the broken URL's on your site
If you have a big site with many pages, especially one with lots of images that you have linked to externally (or just a lot of regular links for that matter), it may end up becoming very difficult to keep track of whether everything is still in working order.
The free application below, developed by a very nice gentleman named Tilman Hausherr, does a scan which took about 5 minutes to complete for my HVC site, which has a huge number of links at this point. Found 2 missing images and one broken text URL. Of course, I had no idea that they were even gone! Very impressive!
The free application below, developed by a very nice gentleman named Tilman Hausherr, does a scan which took about 5 minutes to complete for my HVC site, which has a huge number of links at this point. Found 2 missing images and one broken text URL. Of course, I had no idea that they were even gone! Very impressive!
Download, install and run to see how well you are doing with your URL's:
.................................................................................................................................
Subscribe to:
Posts (Atom)